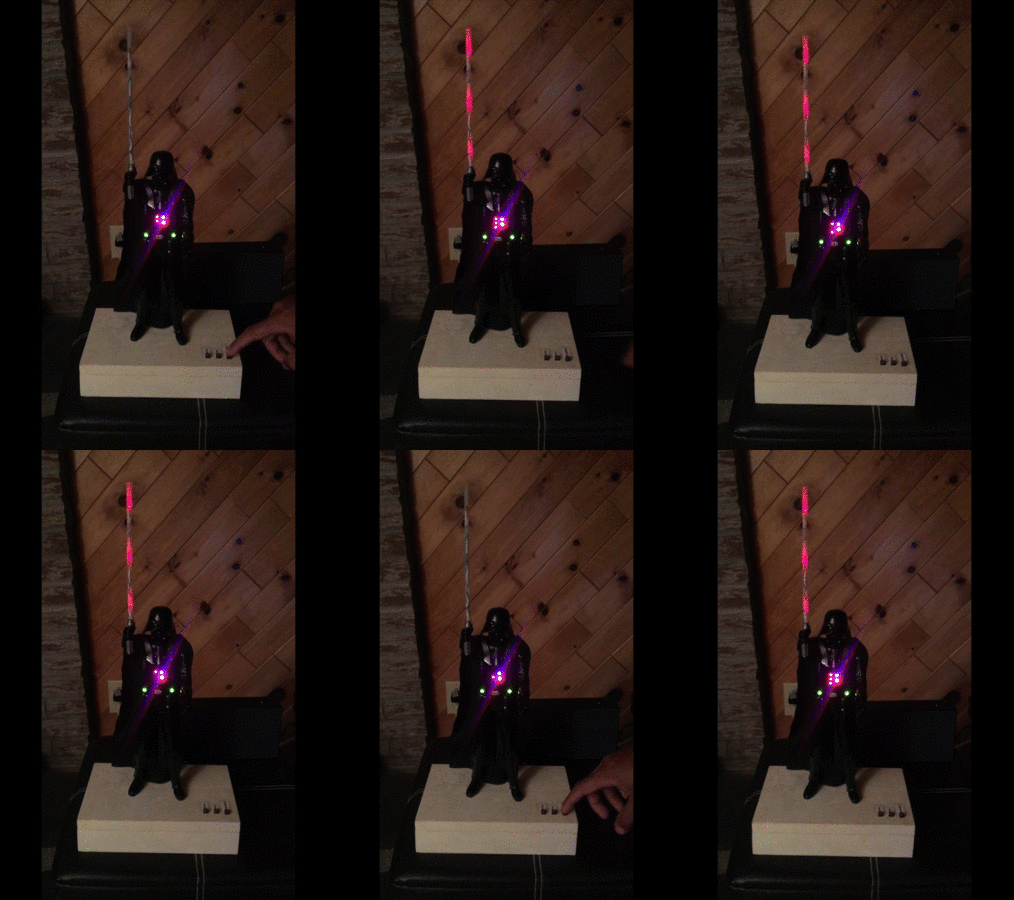
Darth-Vader-RPi (v0.1.0a0) is a Python-based Raspberry Pi (RPi) project about activating a Darth Vader action figure by turning on LEDs on his suit and lightsaber, and by playing sounds such as some of his famous quotes.
If you don’t have an RPi, don’t worry. You can still test the script on your own computer
because the darth_vader_rpi package uses the SimulRPi library to simulate I/O
devices connected to an RPi such as LEDs and push buttons by blinking red dots in the terminal and playing sounds when a keyboard key is pressed.
Almost like testing with a real RPi!
Contents
- Introduction
- Connection diagram
- Dependencies
- Installation instructions
- Usage
- Credits
- Resources
- References
1. Introduction
The Darth Vader action figure is 11.5 inches tall (which is this one from Hasbro) and was modified to make it more lifelike by illuminating the lightsaber, chest control box, and belt. 3 push buttons control the following sounds and LEDs:
Some of his famous quotes
The Imperial march theme song
The lightsaber drawing, hum and retraction sounds
The lightbsaber illumination (3 LEDs)
His iconic breathing sound plays in the background indefinitely almost as soon as the RPi is run with the start_dv script.

Click on the above image for the full video to see the LEDs turning on and hear the different sounds produced by pressing the push buttons
2. Connection diagram
Here’s how the various LEDs and push buttons are connected to the Raspberry Pi:

The lightsaber is illuminated by 3 LEDs connected in parallel
The Top, Middle, and Bottom LEDs illuminate the slots in Darth Vader’s chest control box. They blink in a specific sequence as specified in the configuration file.
When the Lightsaber button is first pressed, it produces the drawing sound, illuminates the sword, and a hum sound persists until the Lightsaber button is turned off. If the button is pressed again, it produces the sound of retracting the lightsaber and turns it off.
NOTE: the Lightsaber button can be pressed while the Song button or the Quotes button is playing audio since they use different audio channels.
The Song button plays the Imperial March song by Jacob Townsend
The Quotes button plays famous Darth Vader quotes when pressed. For testing purposes, the
darth_vader_rpipackage comes with two movie lines:“Nooooo” (YouTube): it is also used for the closing sound when the start_dv script exits
However, you could add more quotes if you want.
3. Dependencies
Platforms: macOS, Linux
Python: 3.5, 3.6, 3.7, 3.8
Packages
dv_sounds>=0.1.0a0: for retrieving the sound files (quotes, songs, and sound effects).
pygame>=1.9.3: for playing sounds.
pynput>=1.6.8: needed by
SimulRPifor monitoring the keyboard when simulating push buttons with keyboard keys, i.e. when running the start_dv script in simulation mode.SimulRPi>=0.1.0a0: for partly faking
RPI.GPIOand simulating I/O devices connected to an RPi such as LEDs and push buttons in case that you don’t have access to an RPi.
4. Installation instructions
It is highly recommended to install
darth_vader_rpiin a virtual environment using for example venv or conda.Make sure to update pip:
$ pip install --upgrade pip
Install the package
darth_vader_rpi(released version 0.1.0a0) with pip:$ pip install git+https://github.com/raul23/Darth-Vader-RPi@v0.1.0a0#egg=Darth-Vader-RPi
It will install the dependencies if they are not already found in your system.
5. Usage
5.1 Script start_dv
Once the darth_vader_rpi package is installed, you should have access to the
start_dv script which turns on LEDs and plays sound effects on a Raspberry Pi (RPi).
Run the script on your RPi with default values for the GPIO channels and other settings:
$ start_dv
If you want to test the script on your computer (use the -s flag for simulation):
$ start_dv -s
To display the script’s list of options and their descriptions:
$ start_dv -h
5.2 Simulating on your computer
If you don’t have access to a Raspberry Pi (RPi) and want to try out the start_dv script, you can run it with the -s
flag. It will make use of the SimulRPi library to simulate LEDs and push
buttons connected to an RPi by blinking red dots in the terminal and monitoring pressed keyboard keys:
$ start_dv -s
NOTE: the last command makes use of default values. See Change default settings on how to change these values.
Here’s how the keyboard keys are related by default to push buttons connected to an RPi:
cmd_l—–> lightsaber buttonalt_l—–> song buttonalt_r—–> quotes button
Check Change keymap if you want to change this default key-to-channel mapping.
Here is a video of what it looks like in a terminal when running the start_dv script on a computer instead of an
RPi:
6. Credits
6.1 Sounds
Darth Vader quotes:
Music:
Imperial March song by Jacob Townsend is licensed under a Creative Commons (CC BY-NC-SA 3.0) License
NOTE: The original song file was reduced under 1 MB by removing the first 7 seconds (no sound) and the last 2 minutes and 24 seconds.
Sound effects:
6.2 Others
Schematic:
Scheme-it from Digi-Key Electronics is an online schematic and diagramming tool that allows anyone to design and share electronic circuit diagrams.
Slot LEDs sequences:
7. Resources
8. References
dv_sounds: a package for downloading the various sounds needed for the project, e.g. ligthsaber sound effects.
pygame: a Python library to write multimedia software, such as games, built on top of the SDL library.
RPI.GPIO: a module to control RPi GPIO channels.
SimulRPi: a package that partly fakes
RPi.GPIOand simulates some I/O devices on a Raspberry Pi. It makes use of the pynput library for monitoring the keyboard for any pressed key.

![LEDs and buttons simulation in a terminal [Darth-Vader-RPi project]](https://img.youtube.com/vi/NwVQlh5eu1g/0.jpg)